


What is Postmark?
Postmark is the email delivery service that developers and product teams actually like. Send transactional and marketing emails and get them to the inbox every time.
Postmark maintains one of the best delivery reputations in the industry by routing transactional and promotional messages through parallel but separate sending infrastructure. (source: G2)
What is Adalo?
Adalo is a no-code app development platform that enables you to build an app without writing a single line code.
You can publish the App to the web or App Store and Play Store without writing code.
If you're new to no-code, check out the post on Beginner's guide to No-Code.
Integrating Adalo with Postmark
Create an account with Postmark and generate a Server API Token
Once you create a Postmark account, you'll need to create a server to start sending emails.
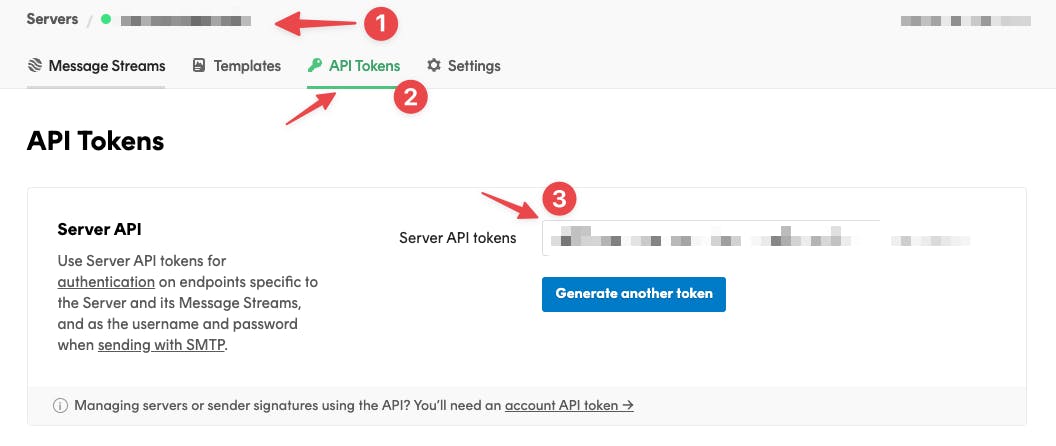
After creating the server, follow the steps below to get the server API token.
Click on the server name
Click API Tokens
- Copy the API Token
Once you have the API Token ready, you can access the Postmark API docs here.
Setup custom actions in Adalo to send emails with Postmark
Create new Custom Action in Adalo
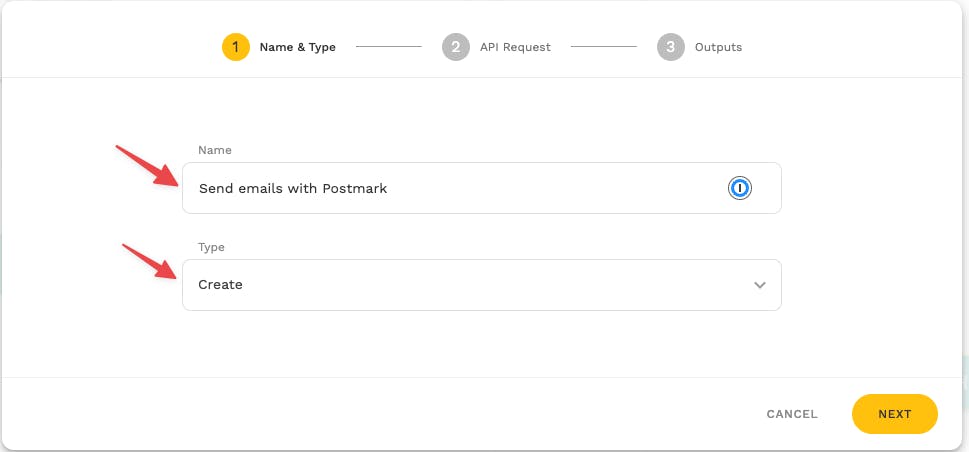
Click "Next" to configure the custom action
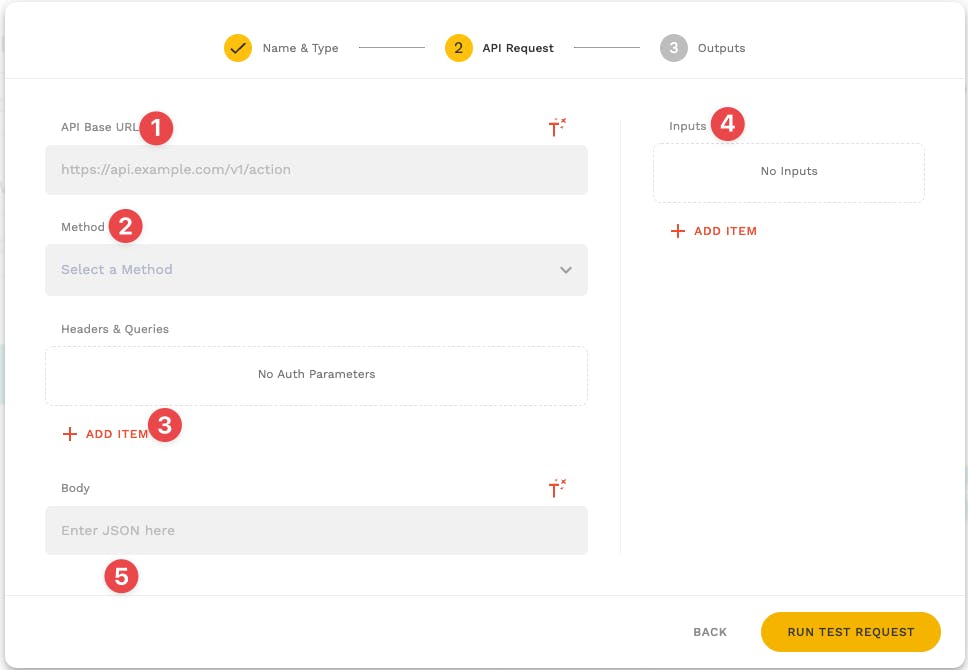
Custom action requires the following parameters:
- API Base URL
- Method (POST) - Sending data through an API
- POST
Headers
- Accept: application/JSON
Content-Type: application/JSON
X-Postmark-Server-Toekn:
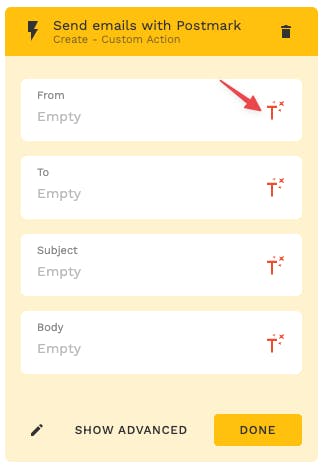
Inputs (from, to, subject, body)
- From (sender email)
To (recipient email)
Subject
Body (email body)
- Body in JSON format
Below is the format from Postmark's API documentation
Example request with curl
curl "api.postmarkapp.com/email" \ -X POST \ -H "Accept: application/json" \ -H "Content-Type: application/json" \ -H "X-Postmark-Server-Token: server token" \ -d'{ "From": "sender@example.com", "To": "receiver@example.com", "Subject": "Postmark test", "TextBody": "Hello dear Postmark user.", "HtmlBody": "Hello dear Postmark user.", "MessageStream": "outbound"}'
Configure the API request in Adalo as shown below based on the documentation from Postmark
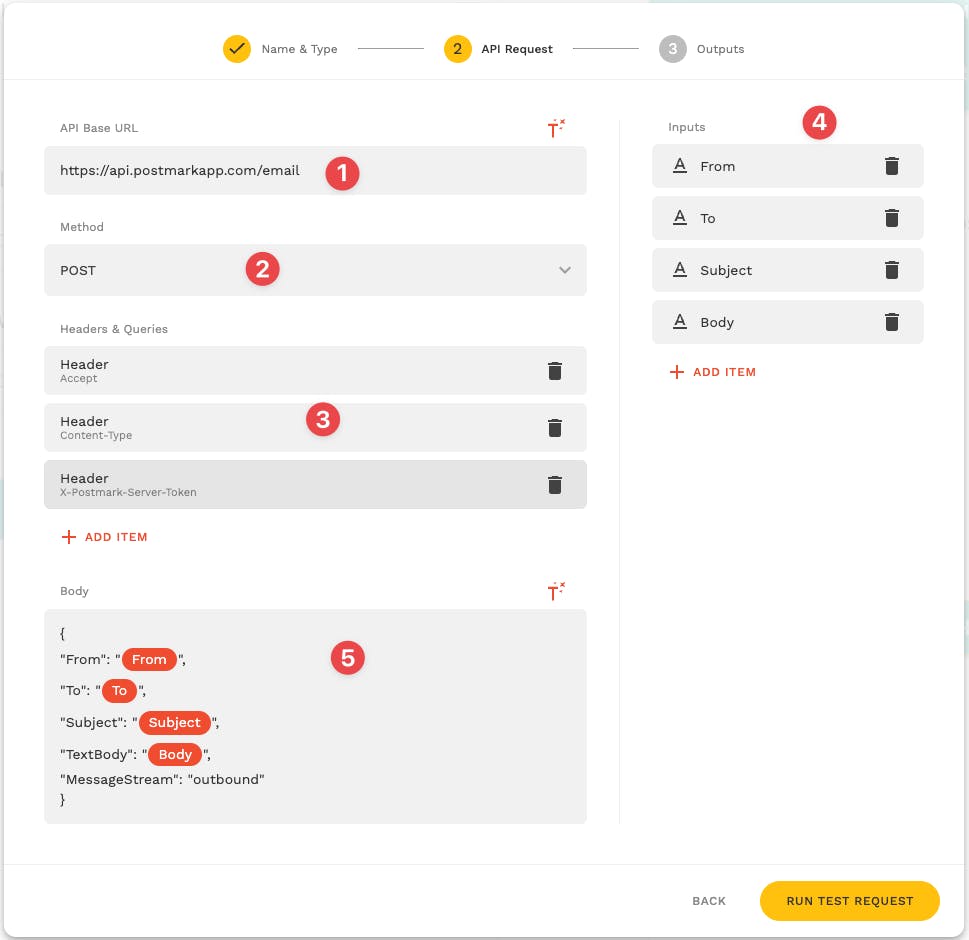
As shown in step 4, the inputs can be configured to send dynamic data and use Magic Text in step 5.
Once all the setup is complete, click "RUN TEST REQUEST" to send your first email via Postmark.
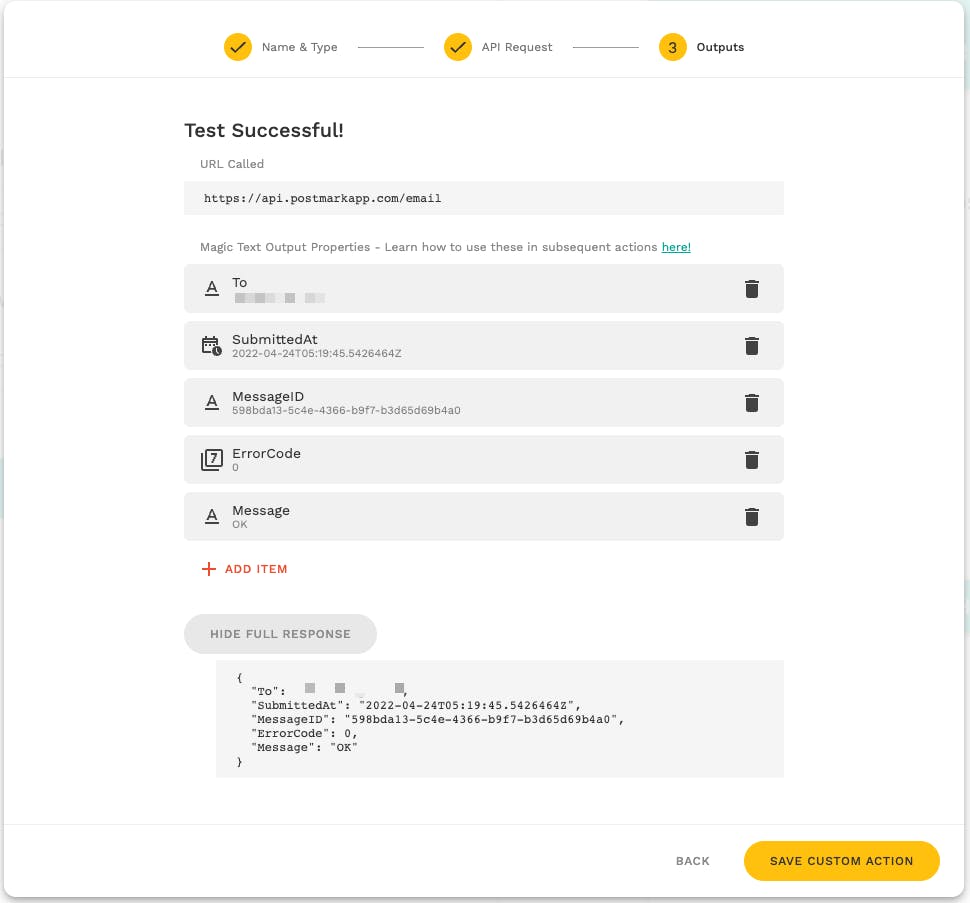
Upon successful test, save the custom action to send emails from your application.
Trigger your custom action in Adalo and send the dynamic values to the custom action using magic text in Adalo.
Use the custom action every time you wish to send an email from your Adalo application.
Congratulations! You have successfully set up your email integration with Postmark for your Adalo app.
If you're new to No-Code, you can access beginner's tutorials from here.